This is a stretch sequence that helps to relieve tension in the hips, quads, groin, and lower back. The motion involves walking your upper body weight around in a series of bends and twists using only your hands and upper body strength while keeping your lower body planted on the floor. It’s called a walking tripod because your body weight is supported by three tripod legs: one hip and the two arms. The hip stays in place while the arms walk around it. Instructions are given for the left-hip walking tripod. The right-hip walking tripod is the same except all the lefts and rights are swapped.
Sequence Steps
- Enter the initial position (left deer pose) for the sequence:
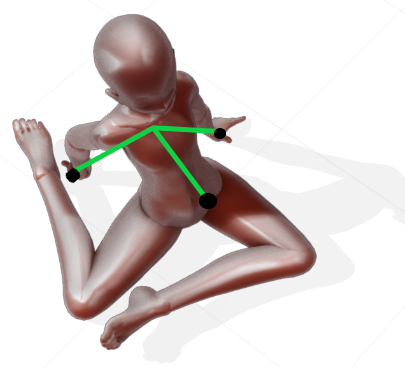
- Gently sit on on a carpeted floor or yoga mat with both knees bent at about a 45° angle. Place the inner side of your left leg facing up and the outer side of your right leg facing up with your right knee close to your left foot.
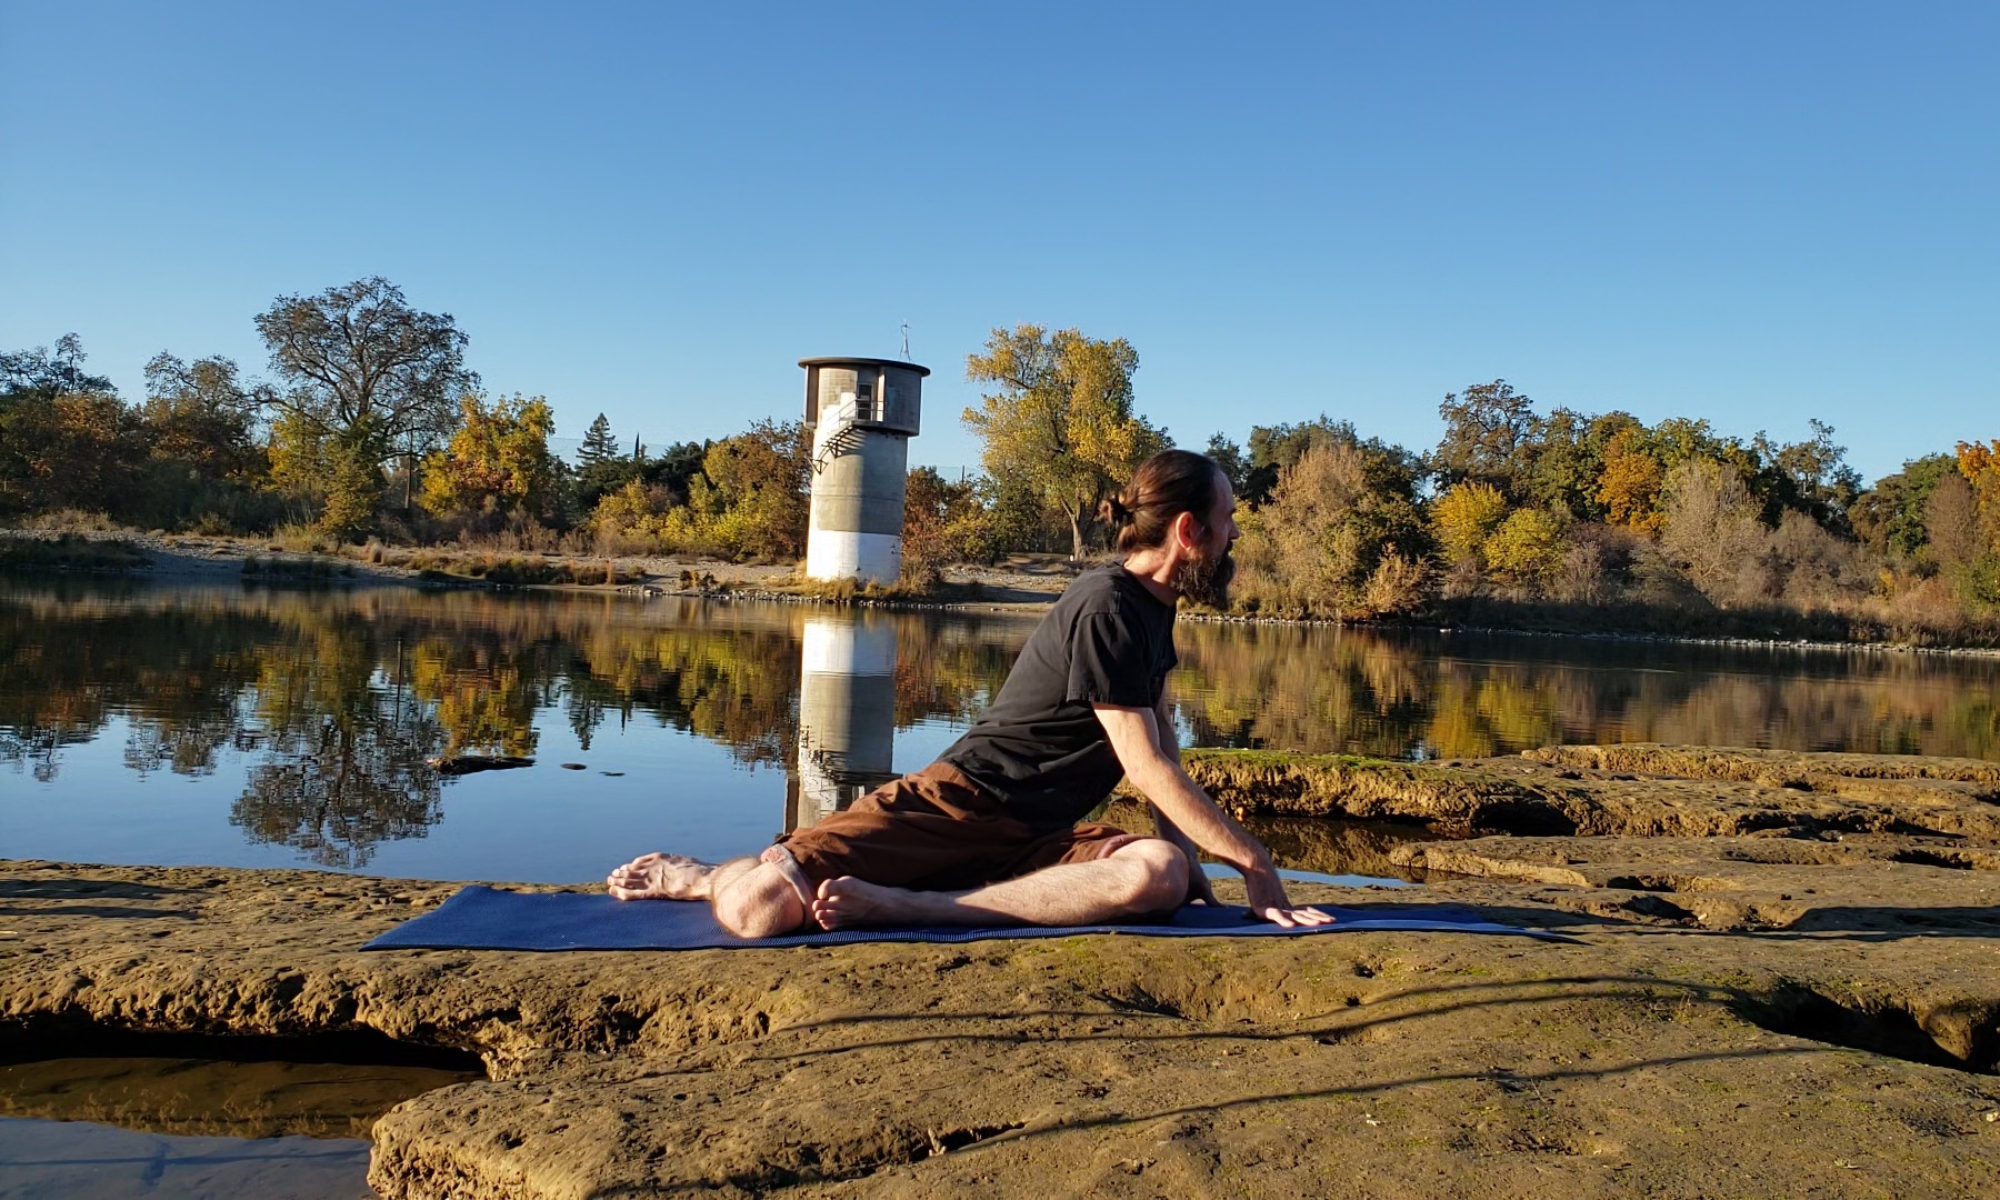
- Place your hands on the floor behind you for support. Your hands and left hip form the three feet of the tripod that should support the weight of your upper body. Your lower body – from the middle of your back down to your toes – should not need to engage any muscles in this position and ideally will feel completely relaxed with no tightness.
- Slowly shift your body weight so that you feel the weight over each tripod leg for a few seconds, then come back to feeling centered equally over each tripod leg.
- Take a deep breath, imagining that your lungs extend into your legs down to your knees. When you exhale, feel the wave of relaxation continue through your legs, allowing your hips and lower back to fully relax.
- Slowly walk your hands around your body:
- Very slowly shift your upper body weight off your left hand to your left hip and right hand by pushing both hands into the floor, causing your chest to lean forward slightly. When the weight is completely off your left hand and is centered over your right hand and left hip, lift your left hand and place it on the floor in front of your left shin.

- This time, slowly shift your body weight so that you feel the weight over each pair of tripod legs for a few seconds, then come back to feeling centered equally over each.
- Very slowly bend your elbows, allowing gravity to drop your upper body closer to your right knee until you feel slightly higher muscle tension than the initial position in the lower back, hips, or legs. Pause and take a deep breath, relaxing the lower body on the exhale to see if you can return to the deep relaxation of the initial position.
- Slowly shift your upper body weight off your right hand to your left hip and left hand by pushing your right hand into the floor. When the weight is completely off your right hand and centered over your left hand and left hip, lift your right hand and place it on the floor in front of your right shin. Gently allow your weight to equalize again on all three tripod legs.

- Gently turn your shoulders so that your chest faces your right knee.
- Imagine leaning forward so that your chest moves toward your right knee. Mentally assure yourself that:
- A body free of tension will feel relaxed in the lower back, hips, and legs in all body positions between the current one and the chest touching the right knee.
- The cause of any position in between those two points feeling tighter than this in the lower body is muscle tension, not just engagement, since the lower body is uninvolved in this motion.
- Slowly start to bend both elbows, allowing gravity to pull your upper body toward your right knee. If no tension can be felt in the lower body, continue lowering your upper body using your arms to control the speed until a small bit of lower body tension remains after relaxing.
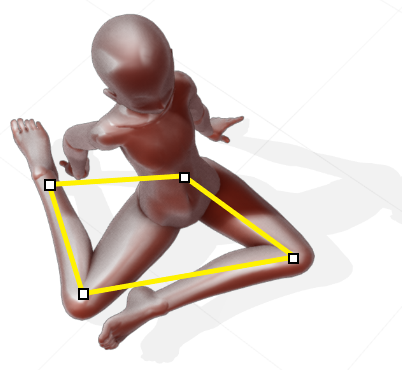
- Keeping the upper body slightly bent over, slowly use your hands and elbows to shift your weight from your right hand to your left hip and left hand. When the weight is completely off your right hand and is centered over your left hand and left hip, lift your right hand, cross it over your left hand, place it on the floor in front of your left knee, then gently allow your weight to equalize again on all three tripod legs.

- Shift your weight from your left hand. Place it on the floor behind your back into its initial position and equalize the weight.

- Use your hands to very slowly shift your body weight from your right hand. Lift and cross it over your left hand. Place it on the floor behind your left hip and equalize the weight.

- Slowly turn your shoulders to the left until you feel substantial resistance to turning further.
- Shift your weight from your right hand. Place it back into its initial position as your shoulders turn back to the front and equalize the weight.

- Very slowly shift your upper body weight off your left hand to your left hip and right hand by pushing both hands into the floor, causing your chest to lean forward slightly. When the weight is completely off your left hand and is centered over your right hand and left hip, lift your left hand and place it on the floor in front of your left shin.
- Repeat the tripod walk around the body in the same manner, attempting to keep the lower body relaxed and uninvolved while the upper body does all the work. Throughout the motions, take brief pauses for microstretches, which may include a deep breath, ensuring each pause of the stretch is performed at the most relaxed level currently possible for that body position.
- If the hips, lower back, or legs start to tighten up, pause the motion and use these steps to relieve it:
- First, try to maintain the position of the chest by breathing deeply and sending the relaxation from the exhale to the tight area.
- Next, if the tightness is minor, try shifting your weight back and forth to different tripod legs to try to convince your body that the tightening muscles are unnecessary to hold up the tripod.
- If the tightness continues, move slowly back to a position where the body feels relaxed again. Modify the motion slightly to avoid the tight area.
Background
This is one of the first stretch sequences I developed and is one of my favorites to practice. I can literally spend hours at a time doing variations of this sequence. At the core of this sequence is muscle isolation of the lower body so that it can get into lots of different poses without having to engage. Muscles are much more likely to stretch successfully when they can relax and let other muscles do the work.
I previously named the initial pose “rhombus pose” because it looks like the legs form three sides of a rhombus shape along the yellow lines shown in the picture above. Since then, I found references to this pose as “deer pose.”
Tips:
- If any sustained or sharp pain or muscle spasm is felt during the sequence, immediately move to a comfortable position. Remember where the pain was felt so that you can steer around the pain and move more slowly and gently near that position.
- Do not try to keep your back straight in any of this sequence. Instead, focus on keeping all of the lower body and spine as relaxed and uninvolved as possible.
- Keep the motion as slow as possible so that any tension that creeps in can be quickly relieved.
- Every few microstretches, take a really big breath, exaggerating the upper body expansion when inhaling and exaggerating the collapse when exhaling by gently sucking in your belly as far as comfortable.
- When moving a hand to a new position, you will briefly have only two legs of the tripod on the floor. Provide a bit more support during these transitions by using one hand as two legs of a tripod with the weight balanced between two sides of the hand using a little wrist strength.
- Your knees should not be used for support, although they should remain on the floor for most of the sequence, depending on your current flexibility. If you find that your weight leaves the left hip and balances on one of your knees instead, know that this is reversible muscle tension holding up your weight. Think of this tension like chewing gum holding up a post that needs to fall. As you circle your body in the sequence, feel that gum weakening as the weight begins to return to the hip as the tension releases.
- If a section of the sequence is totally relaxed and you feel ready to increase the difficulty, allow your chest to be slightly closer to the floor until light tension is felt and continue the sequence.
- There are lots of variations of this sequence possible by using different positions of the legs on the floor. I use the deer pose the most frequently for this type of sequence because my lower body has a larger range of fully relaxed motion in this pose than in other poses.